10 Steps To Take To Set Up Solar Panels At Home

Published on: 26 July 2019 Last Updated on: 19 January 2022
Solar Panel

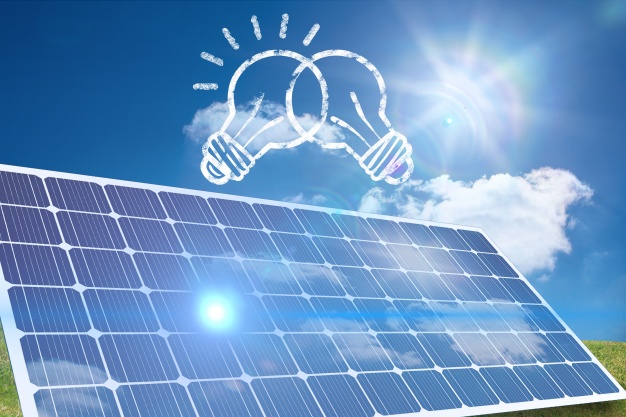
Solar panel has become increasingly popular in the past few years. This is partly driven by how environmentally friendly it is, although many people have noted how economical it can be too. Despite being a smart decision for lowering energy bills, potential users can be put off by its installation costs.

This shouldn’t be an issue, as installing solar panels at home can be much easier than people might expect. As long as you have some DIY electrical knowledge, then you should be able to install the panels yourself.

As Gem Energy Brisbane Solar Power notes, there are a number of steps that you’ll need to take when installing a solar panel at home.

Steps To Take To Set Up Solar Panels At Home

1. Calculate Your Electrical Load:

Before you decide on anything, you should calculate your current electrical usage. Once you’ve done so, you’ll then be able to determine which solar panels and other parts you’ll need. This is relatively simple to do, and often only requires a bit of math, plus an energy reading from your meter.

2. Battery Selection:

Which battery you choose can be vital for your solar power. Naturally, the panels only generate electricity during the day, so you’ll need to store some for the night. To do so, you should choose a high-quality one that provides a consistent amount of electricity over time. This will make it reliable when you’re running several appliances during the evening.

3. Select Your Solar Panels:

There are a considerable number of solar panels to choose from, which can be overwhelming. When you’re deciding on one, you should look at its energy rating. This is typically determined based on set conditions, with some being more appropriate for certain weather. As a result, you should research how well a model will perform in your area.

4. Know Where To Place It:

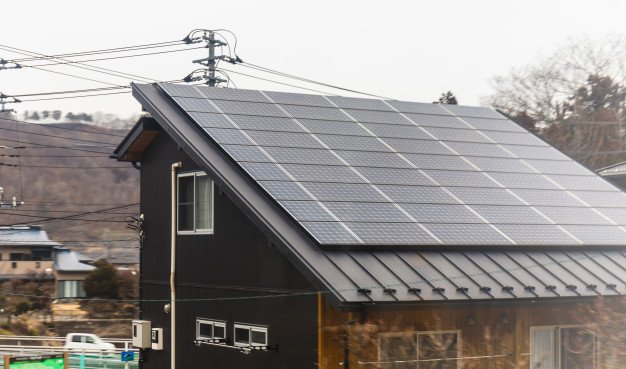
When you’re considering a solar panel, you should determine where the best place on your property to put it is. There can be a few factors at play here, with access to sunlight being the most notable. The obvious place to install the panel is your roof, although you’ll need to decide where to place it here.

5. Choose A Charge Controller:

This is a device that’s placed between your battery and solar panel and regulates the flow of electricity between the two. Choosing the right one can make a large difference, as it dictates how effectively your battery will charge. This means that you should spend a considerable amount of time picking one.

6. Pick The Right Inverter:

Solar panels typically turn sunlight into alternating current (AC). However, most appliances function on direct current (DC). As such, you’ll need to purchase an inverter, which switches from one to the other. There are a few types of inverters to choose from, each with its benefits. As such, you should spend time researching each.

7. Mount The Solar Panel:

Once you have the equipment, it’s now time to mount the solar panel. You can either create your own mounting mechanism or purchase a premade one. If you’re not overly familiar with the process, then it’s recommended that you buy a kit. When creating your own, be aware of the angle that you’re mounting it at, as this will affect how much sunlight it receives.

8. Inverter & Battery Stand:

Similar to the solar panel itself, you may need to build a stand to hold your battery and inverter. However, this isn’t a complicated task, as you’ll be able to make do with a box that includes a hole for the wiring. Once everything has been wired, it’s important to note that you should cover this hole as much as possible to keep everything from being damaged. You should also ensure that it’s kept away from running water.

9. Start Wiring:

The wiring may be the most overwhelming part of the process, although it can be more straightforward than you think. Put simply, the connection should go from the solar panel to your charge converter to your load, i.e., your appliances. Alongside this, the charge controller should be connected to your battery, which should also be connected to your load.

10. Start Enjoying Your Solar Panel:

Once you’ve connected everything in the appropriate manner, you can start enjoying your solar power. While setting everything up, you should ensure that you’ve done so in the right way. The wiring is the most important area here, so you should take care of it.

Read Also:

Content Rally wrapped around an online publication where you can publish your own intellectuals. It is a publishing platform designed to make great stories by content creators. This is your era, your place to be online. So come forward share your views, thoughts and ideas via Content Rally.

View all posts

Leave a Reply

Your email address will not be published. Required fields are marked *

Related

Burn More Calories

Must-Follow Tricks to Burn More Calories

When it comes to a better and healthy life, fitness and sound physical and mental health are key essentials. Many of us get overweighed and it becomes very tiresome for them to lose weight by burning calories. Some people work hard and keep up moving ahead but few just start it and forget they had a work-out and exercise plan to follow. Skipping work using fake doctor’s notes becomes their habit and ultimately they remain as fat they had been. We are presenting some useful tips on how to lose your weight and burn more calories with simple and easy tricks. Have a Bigger Breakfast Recent research shows that people consume 70% calories in breakfast, 50% in lunch and 20% on dinner. The doctors and other physicians suggest that if you are keen about losing weight and keep on improving your fitness, the breakfast you take every day should be bigger than you lunch in energy and size as well. Anyhow, breakfast is recommended to be had daily in order to get better health and now it helps in losing weight as well. Read also: How To Lose Your Weight With Venus Factor Surround Yourself with Blue Though it’s very interesting the researches have proved that people eat 33% less when they are in a blue room or covered with blue themes at the time of dining. Use this fact and you will be surprised that you actually had less while eating. The blue color is an excellent appetite suppressant and people use this trick when it comes to losing weight easily and doing a lot of work-out. Watch Horror Movies Here the tricks we have included belong to all the categories and we have tried our level best to keep it simple. It’s a fact that horror movies help in losing weight as when you watch a horror movie, you get scared and burn more calories. Burning more calories lead to a remarkable reduction in weight. The parents can use this trick easily for their children and teens that have got so much and find it hard to exercise or do work-out in the gym and can’t afford to eat less at a time. This simple and amazing trick will work perfectly for all age-group people. Do Work-out regularly There are multiple ways to lose weight and one of these is doing work-out and proper exercises. It all can be started with the help of a trainer or consultant who proffers guidance on how to get started and what to do first as well. The start should aim at building stamina through short walks, run-ups, and exercises. It should be done regularly and focus on increasing your running time and distance so that you can build wonderful stamina and power to do all the further exercises. Not East Less but East Smartly Keeping the fat people away from eating is not the solution but they must be told to focus on eating properly and the foods that don’t let them get more weight. It often happens that parents direct their children to eat less, basically, this is not a solution but you are just imposing a strict condition on the next person. Eating wisely and being selective when it comes to taking healthy foods is what we all should care about whether we are fat or trying to gain some weight. There are multiple ways to get rid of your weight and turn yourself into a smart guy. Healthy foods, proper exercises, good water in-takes and keeping your spirits up for work-out and exercises are the necessary requisites for heading towards the very aim successfully. Be fussy in your foods, edibles and following these mentioned tricks will help a lot in burning more calories.

READ MOREDetails
Safeguard Your Loved Ones Against the Dangers of Radon Gas

Safeguard Your Loved Ones Against the Dangers of Radon Gas

Radon Gas is one extremely harmful elements present in our environment that cannot be seen, is odorless and also tasteless. It is the end result of decaying uranium in the ground that ultimately takes the shape of gas and gets emitted into the air above the ground. Essentially, radon is harmless when it remains outdoors, but after seeping inside any construction it leaves a long-term negative impact. If the required preventive measures aren't taken, the gas gets accumulated at a dangerously high concentration. This radiation is actually the number one cause of lung cancer in the United States for nonsmokers. And overall, it ranks being the number 2 cause of lung cancer in Canada and the US. Therefore, you must protect your family and your loved ones against the terror of this deadly and unseen menace. Radon Testing Testing for radon, including both the DIY and professional support ways, is a pretty easy and straightforward process. 1. DIY Radon Gas Test Kits : The DIY radon gas kits used for short-term testing are charcoal-based where a canister collects the particles of radon present in the air of a particular environment. The exposure period usually ranges from 48 hours to 72 hours. While the kit does its job, you are supposed to follow a few important steps. While testing, make sure to keep all the doors and windows closed for as long as possible. This will allow the apparatus to get the most precise readings. In the end, the entire kit is sealed, a few forms are to be filled and then the user has to courier the complete package back to the (authentic) testing laboratory where the results will be compiled. All the accumulated radon particles will be tested by the experts and a detailed report will be prepared to be sent to the user. DIY Test Kits - Why Should You Buy? These kits are easily available online as well as offline stores. They are very much affordable and a user can test the concentrations himself. Such kits are ideal when you are doubtful about the situation but don't really want to invest a fortune into professional services. Exposure time is also manageable and at the end, you get expert suggestions about the circumstances. There's optimal accuracy maintained and that's what you may even long for! You must also know that if you get precise results only then it will benefit the whole situation.  Results that are achieved at the end form the basis for preventive measures that you might have to apply in case of higher concentrations. However, in case the levels appear safe and under the accepted levels, there's nothing else you will have to worry about. Electronic Radon Gas Detectors : These are electronic radon monitors that keep a check on the radon levels in your house. Such detectors are power or battery operated. The results are readily available, without wasting any time you can take the preventive measures and results too can be achieved on the spot. The hassle to courier a package and wait for the results gets avoided as the electric radon gas detector brings out precise readings right after the exposure time ends. Click here to know more about electronic radon monitors Electric Radon Gas Detection Monitors - Why Should You Buy? These devices administer only professional and advanced technology to help you keep the dangerous radon gas away. A radon detector can be useful in both home constructions as well as commercial properties. So, once you have the accurate results, you can take corrective steps to disperse the gas out of your property. On the basis of the readings you get, a radon mitigation plan is to be laid out for your home. And it is only in this manner that you become both an informed citizen of the nation along with being a responsible member of your family as well as the society. You will be able to take the next steps i.e. how to make your home radon-free! Radon Mitigation System When the test results report of any unsafe levels of radon gas inside your home, you will have to address the problem. In fact, address the problem as soon as possible. Contact a specialist or do it yourself if you are confident enough to be able to fix all the loopholes. However, an expert can actually help you in installing the right type of radon mitigation systems. A radon reduction system that cannot perform aptly is of no use. So, depending upon the kind of construction your home has, a multiple numbers of options will easily be made available by the professionals. The most prevalent option is the sub-slab depressurization along with sub-membrane depressurization. It is ideal for homes, basements as well as crawlspaces. 1.Sub Slab Depressurization Method : This method involves the drilling of a hole into the floor of your home's foundation and scooping underneath a slight cavity. A pump is then connected to this drilled out hole to vacuum radon gas before it can even break out and start causing harm to the members in the house. Even the other organic contaminants are pulled out from below to vent out the dangers present in your house. 2. Sub Membrane Depressurization Method : This method is actually similar to the method mentioned above. However, the only difference lies is in the membrane that is installed above the ground as opposed to a cavity being created in the other method.  In fact, the membrane is fitted right above the floor of the crawlspace, so the radon gas can easily be trapped and be vented out of the house. The gas is extracted out in a similar manner as above; there just isn't a slab but a membrane. One can consider any of the mentioned ways to get rid of radon gas from your home. But you'll have to ensure that radon must be released at a place where it will not cause any further damage to the people or animals. Radon mitigation isn't a one for all kind of treatment. And every house needs its own tailor-made preventive measures.  It may or may not be the job for a DIYer. From targeting the entry points of the radon gas to sealing all those spots, it is a pretty important process. One must have the needed skills, the absolute presence of mind and knowledge to ensure the safety of all the members in the family. If you aren't sure how to go about, contact any professional radon inspector. But, if you are knowledgeable enough to restrict the flow of gas in your property, then go ahead and save your loved ones. Read More : First Home Renovation Ideas And Tips What Are Renewable Sources And How To Introduce Them Into Your Household? Additional Ways To Keep Your Home Warm   Image Source: http://cancercarenews.ca/

READ MOREDetails
Electricity Rates

Follow These Simple Steps to Compare Electricity Rates Online

You may ask – “Why to bother comparing electricity rates?” Well, the majority of power supply companies in Australia are known for price differentiation. They have different prices for different customers. The rates also change with location. There are many reasons for such situations including: Electricity demand Cost of fuel Maintenance and operating cost of power companies Government regulations, etc. Hence, it is vital to compare the rates before you opt for one company. However, if you have not done so before, there is a high chance you are already paying high prices. Well, worry not as various websites have got you covered! Those dedicated websites can help you compare the electricity rates and plans of various companies across the continent and avail the best deal on offer. How to compare? The process to compare electricity pricing plans differs from websites. However, there are a few simple steps that are generally applicable. Note that, you can also compare gas plans as well. The steps include: Select the type of energy you are looking for: electricity, gas, or both. Enter your postcode. Select the type of property you own – house or business. If house, you may have to provide the number of residents. For example, 1 person, 2 to 3 people, 4 to 5 people, or more than 5 people. Provide some other information. Like, whether you have a smart meter, solar panels, etc. Select the electricity distributor in your area. Select the electricity provider in your area. Enter your recent electricity bill. You can skip this step though. In case you want to provide, you will have to input additional information like peak/off-peak rates, controlled load, etc. After you have entered all the information, hit the respective button to proceed. In the next page, you will get to compare electricity rates and plans of various power companies in your area. What to look for? Look for the following when you compare electricity plans: 1. Late payment fee: The charge you incur if you fail to pay the bill within the due date. 2. Payment processing fee: Some companies charge you a processing fee for each payment. They can also charge you an additional amount for payments made using a credit card. 3. Paper billing fee: You have to pay a fee for having a hard copy of your bill delivered to your home. 4. Tariff charge type: Electricity suppliers have either of the following: Single tariff – Fixed charges up to a particular limit (kWh). Charges increase after crossing this limit. Time of use tariff – Charges differ with time. Companies may have different charges for weekdays and weekends. Weekends may not have off-peak charges, unlike that of weekdays’. 5. Solar feed-in: If you have solar panels installed, you can get subsidies on your bills. Although low, solar feed-in charges can help you save some. 6. Green power: The amount of green power that you can opt for differs with companies. Generally, it ranges from 25 to 100%. So, easily compare electricity rates from these websites, and you might be able to save a considerable amount on your next bill. Read Also: How To Save More Money? Portable Generators: 5 Ways To Keep Them Clean And Running

READ MOREDetails