3 Amazing Flower Street Garden – How to Design

Published on: 18 March 2017 Last Updated on: 12 September 2024
Amazing Flower Street Garden

When it comes to planting your garden, perhaps you love nothing but the joy of rooting, tilling, and otherwise nourishing your plants and flowers to grow to be amazing and beautiful. Really, you are passionate about gardening, and would not trade the experience for anything.

That said, perhaps you have experimented with tons of different types of gardening, from hydroponics to indoor planting. This time around, you are probably curious to take on planting flowers…on the street.

While you might find it to be a piece of cake, there is a certain art to it, and we are here to help you out! Read on to learn more in this article on how to design an amazing flower street garden. Pretty soon, you will be well on your way to an excellent garden that you can show off to your family and neighbors.

Without further ado, let’s get started!

How to Design an Amazing Flower Street Garden

First things first, it is necessary to take some time to research just how you are going to start your flower street garden. It is not just a matter of rushing into doing so, but rather taking the time to yield great results. Trust us: in the end, it will all be worth it. Here are three, simple steps to follow:

1. Select your plants and flowers

Select your plants and flowers

Aside from choosing plants and flowers that look aesthetically-pleasing and color-coded with each other, it is also a matter of choosing some which can co-habit together peacefully.

In other words, you need to select plants and flowers that can grow well without having to fight for the same nutrients in the soil, let alone fertilizer.

Really, competition can be fierce for some of them, which can end up leading not only to inadequate nutrients being distributed unevenly but also inadequate growth on both parts of the plants and flowers.

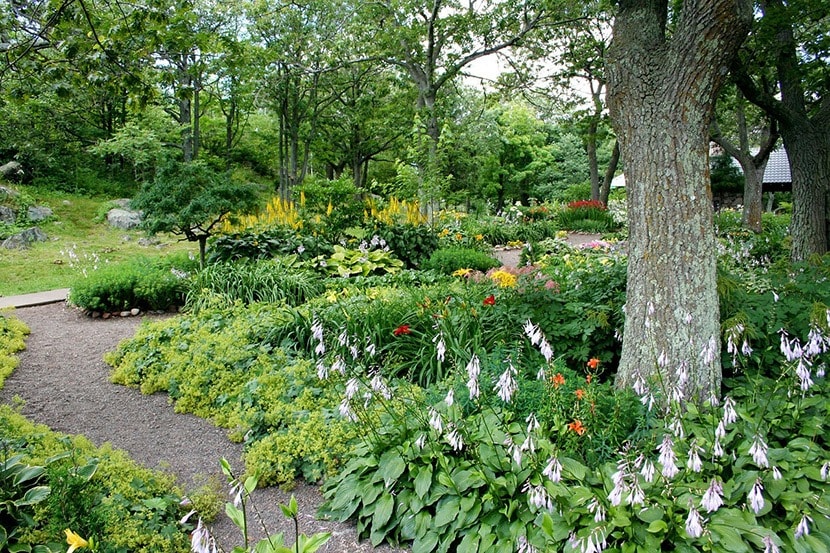
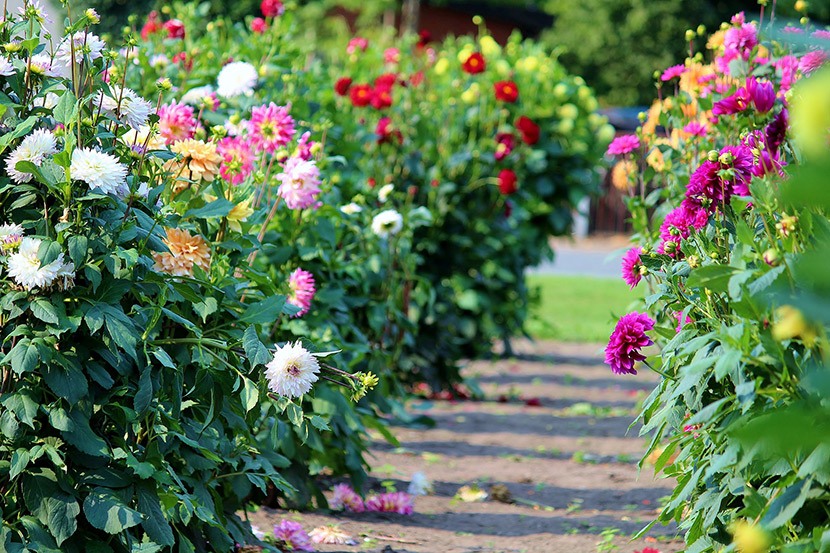
For instance, zinnias and geraniums go well together, both in terms of being planted together and color-scheming. Another good one to refer to is that of Melampodium and shrub rose, which add that extra pop to your home curb appeal.

2. Keep them orderly

Paradoxically speaking, this point is both about keeping your street garden limited just to a few plants and flowers, but also diversifying them for an aesthetically pleasing sight.

What do we mean by this? In other words, it is advisable not to go crazy with too many different species of plants and flowers within a given plot of land, considering that, again, they will have to compete for nutrients (which can affect how they grow), as well as create a hodgepodge of all sorts of species which can make it look a bit too disorganized and detract from its attractiveness.

That said, a rule of thumb is to plant just a few varieties: we recommend planting no more than ten sorts of perennials, five kinds of shrubs, and two types of trees. Again, strike a balance between color scheme and practicality, and doing so will make all the difference when it comes to the beautiful results of your street garden.

3. Maintain them regularly

Maintain them regularly

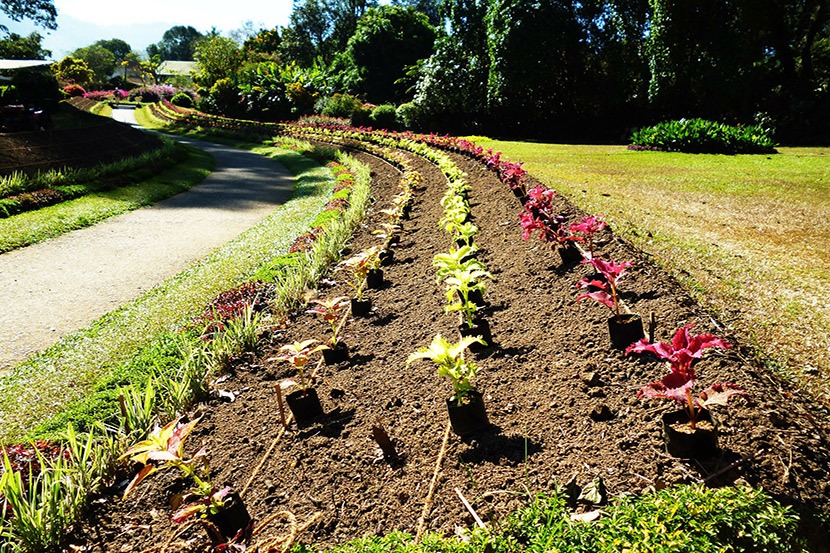
Finally, it is a matter of just getting around to planting and nourishing your plants and flowers along the side of your street. Besides just the basics of watering and giving them enough sunlight to flourish, you will also have to maintain it regularly with appropriate fertilization and pruning from time to time, especially if you are growing plants and flowers that tend to get quite thick and heavy with foliage and so forth.

Hence, for the latter, it is a good idea to have at least a prune tool around to make it easier (and safer) to efficiently keep the plants and flowers under good maintenance. From shears to pole saws to lawnmowers, pruning tools come in all sorts of shapes and sizes, so it is essential to know which ones are the best for the type of pruning you need to do.

*bonus* Give them love and care. While this point sounds corny, it is important nevertheless to care for your plants and flowers like they are your own children.

Doing the basics such as watering, fertilizing, and pruning is a good start, but to take it above and beyond to keep them safe from harsh weather and investing in safety fences to keep out pests and other sources that might otherwise damage, will make the street garden even more lovely and happier.

For an idea of what to expect for street gardens, check out this video here:


Read also: 5 Essential Tips To Designing A Beautiful Front Yard Garden

Overall, street gardening is an interesting concept that is not a bad idea to consider, should you be passionate about planting flowers, in general. With the right amount of tools and planning, you should be able to create an amazing and attractive street garden to call your own.

Abdul Aziz Mondol is a professional blogger who is having a colossal interest in writing blogs and other jones of calligraphies. In terms of his professional commitments, he loves to share content related to business, finance, technology, and the gaming niche.

View all posts

Leave a Reply

Your email address will not be published. Required fields are marked *

Related

Pack For Temporary Storage

More Motivation, Less Distraction: How To Pack For Temporary Storage

You’re among one of the thousands of Americans who find themselves faced with packing for temporary storage. You're not alone... Maybe you're staging your home for a quicker sale, making room for a home office or a temporary classroom amid the Pandemic, or desire the peace of mind that comes from a space that is free of clutter. With so many changes in the worldwide landscape, self-storage has become an asset to homeowners and apartment dwellers. Temporary storage offers flexibility while creating room in your home and free space in your mind. All of those distractions not only lead to lower productivity but also lead to feelings of overwhelm that disempower us from reaching our goals. Feeling encumbered by stuff is a growing trend since so many of us are faced with how many things we actually have during a shelter in place! The good news is that by utilizing temporary storage, you don't have to wait for a bigger home to create that spacious feeling. Whether you're packing for temporary storage due to a transition in your personal life, or just want to free up some space in your home in you home, it can feel overwhelming to do the research necessary to begin the process. How To Pack For Temporary Storage? Here is a full-step guide to pack for temporary storage. read the points below to know everything about it in detail. Clearing some space in your home would also help you concentrate on doing something meaningful to your life. Step 1: Assess the space you have Create a flow in your home.  Your things should fit neatly into the space you have. Although it may be tough to decide what you need, storing things offsite means that your stuff is not gone forever! Get Rid of the clutter! Clutter can be overwhelming to deal with when starting to pack your belongings for storage. Once it's out of the way, it makes the packing process so much easier. Even a few hours of decluttering can make things run a lot smoother. Try getting the family involved, and make it a game! Read Also: Moving home checklist: What you need to know Step 2: Categorize & Inventory Making lists as you categorize your items for temporary storage will make it easier for you to find them as you need them. As you gather items from each category, make a list, or take a photo of what you pack in each box. Label your boxes with a number, and mark your photograph or list with the same number for a visual index. Having a list and documentation is also an asset in the event that an unfortunate or unexpected event should occur and you need to file an insurance claim. Things you use seasonally Your surfboard, your kid's inflatable pool, or your Bermuda shorts won't be of much use when it's snowing outside! Group all seasonal items by season, including decorations, clothing, and footwear together. When these items are packed together, and labeled, it's so simple to swap out a few boxes at the change of season. Sentimental Items You Don't Need Right Away High School Yearbooks, Stacks of your kid's artwork, and other items that have value but are rarely used in daily life can be prepared for temporary storage, so you can access them when you need them! Things You Need, Just Not Right Now Heirloom furniture, boxes of books, or clothes -you're saving for the next baby can all be stored off-site! Step 3: Gather Materials and Pack Following your inventory, pack items of each category together following these instructions for the safekeeping of your items. When packing, it is important to consider that life changes quickly, and although you are packing for temporary storage, you may enjoy the spaciousness this brings and decide to keep your items packed away longer than 3-4 months! Packing items to be stored indefinitely not only safeguards your items but can offer you peace of mind in the event that plans change. Since things often take longer than expected, you can rest assured knowing that your valuable items are safe. Be sure to use sturdy boxes, and always, always make sure the bottom is taped securely shut! Don’t overpack boxes, and make sure boxes can be comfortably lifted and moved. Pack lighter items on the top so they do not crush the contents beneath them. Fill any empty space in the box so it does not collapse. Furniture Clean each piece of furniture, removing any dust, debris, or food remnants. Condition any wood or leather items, and be sure to vacuum all upholstery. Disassemble any furniture. Often the assembly instructions are long gone, so it is helpful to take photos of each step along the way, documenting hardware as you go. When it comes time to reassemble, you can review your photos in reverse, making reassembly a breeze! Use a drop cloth, or moving blankets, wrap your items carefully for transport and storage. While bubble wrap is useful for protecting mirrors and glass, avoid using plastic coverings directly on your furniture. Plastic can trap moisture, which can cause wood to warp and upholstery to mold or mildew. Use only white drop cloths to cover wood or upholstery, as the dyes can bleed in humid environments leading to discoloration of your furniture. Electronics Remove any dust or debris from the item using a dry cloth. If you are storing an electronic device that stores data, be sure to back up any important information before packing it away. Secure packing of electronics is so important! In the event of any bumps or drops, you can be at ease knowing your electronics are secure in their packaging. Remove all cords, and wind them into a circle, securing with a tie. If possible, pack electronic items in their original packaging. If that is long gone, use a box slightly larger than your item, and create a shock-absorbing buffer firmly around the item using packing peanuts or styrofoam. Avoid using any plastics that will trap moisture, and be sure to include several silica packs to absorb any humidity. Always keep your electronics upright. Mark an arrow on the box with the correct direction to ensure that your item is stored and transported safely. Once your device is placed securely in the box, you can place the corresponding cords on top of the packing, and tape your box closed securely. Clothing & Specialty Worn Items Books, Papers, and Photographs Since mold is a common issue when storing books, and papers, it's recommended to ensure they are totally dry. If you live in a humid climate. Paper objects can be stored in smaller, opaque plastic totes to ensure they are kept free from moisture and light, and rodents. Pack larger books lying flat, and store smaller books upright, as you would on your bookshelf. Never store a book on its spine, as it can cause damage to the structural integrity of the book and damage it. Protect your photographs by storing them in an archival album before storing to ensure your photos will be around for generations. To store larger photographs, carefully place them between layers of cardboard, and lie flat. Instruments, Art, and Other Delicate Objects To properly store delicate objects, it is important to have a facility tha is climate controlled, even for temporary storage. Make sure all packing is secure, keeping packing materials out of direct contact with any painted areas, wood accents, or delicate features. You May Also Like: Small Kitchen Storage Ideas Step 4: Finding A Storage Space It can be difficult to conceptualize how much storage space you actually need. Many self-storage websites offer guides that can help you visualize how your things will fit in the space. Some storage units are multi-level, so be sure to ask about accessibility if you need a space that is on the ground level. If you are storing any sensitive items like instruments, electronics, or antiques, be sure to rent a climate-controlled unit. When people think of storage, the image that comes to mind is often a traditional storage facility. While traditional storage is an excellent option for many, there are alternatives that can offer some flexibility, convenience, or some sizable savings. Maybe you have a spare vehicle that never gets used sitting in your garage. Consider storing your vehicle, renting extra space from someone in your neighborhood, or asking a family member or friend to store belongings for you.

READ MOREDetails
kitchen-2619008_960_720

Installing A Kitchen Tile Splashback – The Basics

Adding wall tiles to a backsplash can be a really simple and effective way to spruce up your kitchen sink area, as well as protecting the surface as well. Here we look at the basics. Home improvements needn't be expensive, all it takes is a little research and time and you can make a significant difference to the house you live in. Choosing tiles for a kitchen splashback can be a really simple and effective way to spruce up your kitchen sink area, as well as protecting the surface as well. For a project like this, you are likely to need little more than a couple of days to complete it, and a minimal amount of money to achieve a great result, depending on the equipment you already have. Before You Start Prepare The Wall Before you start, clear everything out of the way that may obstruct the job and/ or get broken or damaged while you work. You should also check that the wall is good for tiling as well – chances are you will choose porcelain tiles, which are heavier than more traditional ceramic tiles so the walls need to be up to support their weight. If there is any level of condensation you must wait for the wall to completely naturally dry out before you begin tiling. If the drywall you're working with isn't sound, you must repair it before you do any tiling. Plan The Design You'll need to plan your design before you can purchase your equipment or begin the project. Measure how high you want the backsplash to be from the countertop and consider the type of tiles you would like to use. If you are unsure, take a look at sites like Pinterest for inspiration. Get Your Equipment When buying your equipment, especially your wall tiles, try to start with more than you need. With porcelain floor tiles or wall tiles, it is always good to have extras in case some get damaged during the job or even years after and you need a replacement tile that matches. In order to determine how much tile requires you need to measure the length and width of the area, you are putting a backsplash on. Simply multiply the length by the width to get your desired wall tile amount. If you don't know what type of equipment you need for the job, speak to an advisor at the shop or warehouse and they will be able to advise you on the best tools for the job. Read also: Close Look At Top 5 Roofing Materials – Pros And Cons Install Once you have done all the correct preparation, it's time for you to install your backsplash. Safety First The first thing you need to do is make the area you are working in safe. All electrical appliances nearby should be either turned off if they are permanent fixtures, or moved away if they are temporary. Read also: Making Your Office Safer For Workers Clean The Area Using a clean cloth, gently wipe the area with warm water and let it dry naturally. Apply The Adhesive Using the manufacturer's instructions, apply your tile adhesive using a tile trowel. Make sure the adhesive is spread thinly and only apply enough adhesive for the area you are tiling, or it will dry before you have applied all the tiles. Lay The Tiles Place the first tile at the bottom of the backsplash in the middle. Firmly push the tile on to encourage it to settle into the adhesive and use a level to make sure it isn't wonky. Use a spacer or piece of cardboard on each corner of the tile and push them into the adhesive well. Continue to lay the tile's row by row, taking care to remove any adhesive that pushes up through the tile gaps. Ensure you are leaving enough room for grout and checking constantly that the tiles are level. Cut Tiles Away In A Separate Area Depending on the equipment you are using, you need to ensure you follow all safety procedures to ensure you are working safely. Ensure you only score tiles where the scored section won't be showing, and only score tiles when you need to, as the measurements needed may change as the job progresses. Wipe Once all the tiles have been laid you can wipe away any adhesive that has seeped out using a clean, damp cloth. Leave The Tiles To Dry You must leave the tiles to dry according to the time stated by the adhesive manufacturer. Trying to skip this process will result in an uneven backsplash and tiles that will not remain stable. Grout When mixing grout you should be wearing appropriate safety equipment such as gloves, goggles and a mouth mark. Grout the tiles precisely and carefully, taking care to wipe away any excess once it becomes firm. Once the grout has dried, you can then wipe the tiles off completely. Well Done! You should now have a fancy new backsplash to enjoy in your kitchen! Remember, if you take the time to do the job right, you should end up with a well-done backsplash that will look fantastic and last for years to come.

READ MOREDetails
home outdoor recoration

No Beauty Without Colors: 7 Ways to Add Color to Your Outdoor Spaces

How’s your outdoor space coming along? Outdoor spaces such as our patios are our sanctuary to relax and unwind after a long day from work. It is also a place where we spend quality time with our family and where we have chit-chats about how our day went. We can't afford, for sure, to see the place we called sanctuary as lifeless and dull. Therefore, adding some refreshing colors to enliven it is necessary for us to have the best family bonding and a place to relax. The good thing is, giving some life to your outdoor spaces doesn’t have to be laborious and expensive. The colors may come from your furniture, tiles, plants, pots, and outdoor rugs. Here are some ways to consider if you want to add up some color and life to your outdoor spaces. Colorful Plantscaping Bringing some ambiance of nature into your outdoor spaces cannot be understated, and plant-scaping is necessary to put in that ambiance. When choosing for plants, it’s alright to be simple and to go with a greeny landscape. But it’s much better if we add up an array of colorful flowers. To be more colorful, you can opt for a collection of Mandevilla, gardenia, plumbago, and sunflower. But there are many other colorful plants out there in your nearest garden shop that will surely suit your taste. Pot Art Do your flower pots look dull? Perhaps, it’s time to do them some paint job. Not only your plants and flowers can spice up your garden, but also your flower pots. You can do some fun art on them with a color scheme that can add an artistic beauty to your landscape. In this way, your garden will not anymore look dull. Put Colorful Outdoor Furniture on Display Chairs, tables, and shades are center attractions in our patios. You can turn them into a more attention-grabbing status if you show them off in bright colors. For sure, it can add a more refreshing ambiance while you’re having your afternoon coffee. Roll Out The Outdoor Rug If you want to add some interesting detail to your outdoor dining or seating areas, you can place an outdoor rug under it. Rugs with beautiful designs are essential in order not to give your outdoor spaces a basic look. Blend In Decorative Tiles There are a lot of decorative tiles to choose from in the market today. Decorative tiles are a good way to go if you want to start styling up your outdoor structures such as your fountains, stairs, and kitchen countertops. Paint Up Your Bare Walls With Murals A mural is the best way to brighten up your dull wall. Not only that this will not consume up a lot of space, but a wall with a mural can also bring us peace of mind every time we look at it. Outdoor Decors You can enliven your patio or garden with outdoor decorations. For example, you can put bright-colored hanging baskets on display in your garden. Mosaic art, colorful stepping stones, and tabletop lanterns are also things that will give charm to your outdoor spaces. Takeaway We must not settle for the simple and basic when it comes to designing our outdoor spaces. There are a lot of ways to put some life to it such as adding up some colors. It also does not have to be challenging and expensive as some ideas mentioned above are do-it-yourself tips. What we only need is a little budget and our creativity. Read More : Mirror Decorating Ideas To Style Your Bathroom How To Make Your Home Look Like A Splendid Hotel?

READ MOREDetails