How to Harvest Spinach the Right Way: A Step-by-Step Guide 

how to harvest spinach

Being a gardener, I know Spinach is one of the most popular and versatile leafy greens you can grow in your garden. It’s rich in vitamins, minerals, antioxidants, and fiber and can be used in salads, soups, smoothies, and more. But how do you harvest spinach the right way so that you can enjoy it fresh and crisp and make it last longer?

In this article, I will show you how to harvest spinach, so it keeps growing. I will also explain how to harvest spinach seeds, how to store and freeze spinach, and the health benefits of spinach. Additionally, I will also share some tips and tricks on how to grow spinach successfully and how to use it in delicious recipes.

Whether you’re a beginner or an expert gardener, this guide will help you make the most of your spinach harvest. So, keep on reading till the end to learn more, and thank me later! 

Driven by Benefits: Why are People Growing Spinach?

Driven by Benefits_ Why are People Growing Spinach_

Spinach is not only tasty but also healthy. It’s low in calories and high in fiber, vitamins, minerals, antioxidants, and phytochemicals. It can help improve various aspects of health, such as:

Eye Health

Spinach is rich in lutein and zeaxanthin. These are carotenoids that protect the eyes from age-related macular degeneration, cataracts, and glaucoma. Spinach also contains vitamin A, which is essential for vision and eye health.

Blood Pressure

Spinach is high in potassium, magnesium, and nitrates, which are compounds that help lower blood pressure and relax the blood vessels. Spinach also contains folate. This helps prevent homocysteine, an amino acid that can damage the blood vessels and increase the risk of cardiovascular diseases.

Bone Health

Spinach is a good source of calcium, magnesium, and vitamin K, which are important for bone health and density. Spinach also contains vitamin C, which helps the body absorb calcium and produce collagen, a protein that strengthens the bones and connective tissues.

Immune System

Spinach is loaded with vitamin C, which is a powerful antioxidant that boosts the immune system and fights off infections and inflammation. Spinach also contains vitamin E, which enhances the immune response and protects the cells from oxidative stress.

Digestion

Spinach is high in fiber, which helps regulate digestion and prevent constipation, diarrhea, and bloating. Fiber also feeds the beneficial bacteria in the gut. This improves the digestion and absorption of nutrients. It also supports the immune system.

Skin And Hair

Spinach is rich in vitamins A, C, E, and iron, which are essential for healthy skin and hair. Vitamin A helps maintain the moisture and elasticity of the skin and prevents acne and wrinkles. Vitamin C helps produce collagen, which keeps the skin firm and smooth.

On the other hand, vitamin E helps protect the skin from sun damage and aging. Iron helps deliver oxygen to the skin and hair cells and prevents anemia, which can cause hair loss and pale skin.

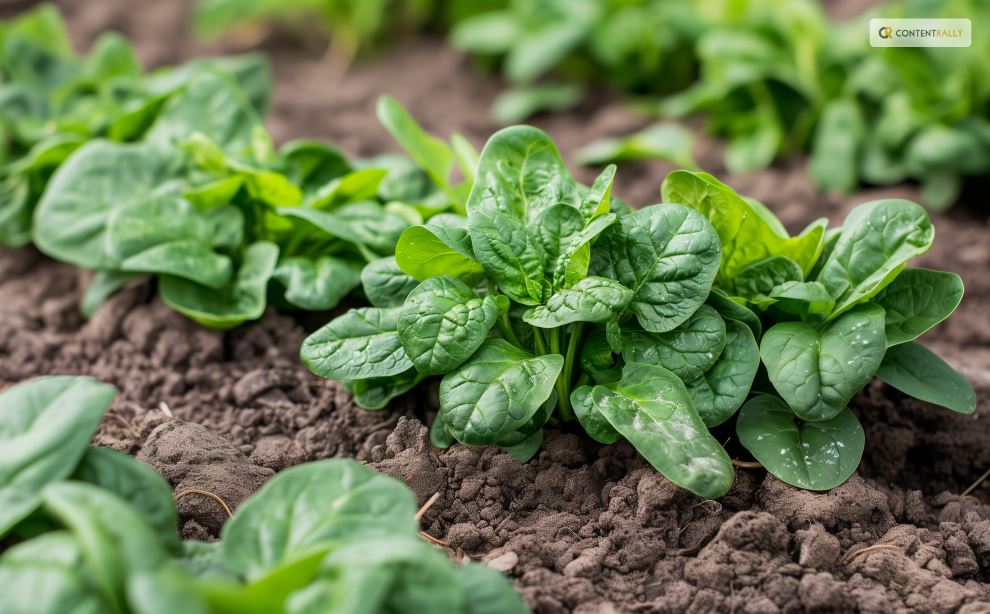
How To Harvest Spinach So It Keeps Growing

How to Harvest Spinach So It Keeps Growing

One of the best things about spinach is that it’s a cut-and-come-again crop. This means you can harvest it multiple times throughout the season if you do it correctly. Here are the steps to follow to harvest spinach so it keeps growing:

Choose the right time to harvest

The best time to harvest spinach is when the leaves are young and tender. This is usually about 40 to 50 days after planting. You can also harvest baby spinach leaves earlier, about 25 to 30 days after planting.

You should harvest spinach before it starts to bolt. This is when it produces flowers and seeds and becomes bitter and tough. Spinach usually bolts when the days get longer and warmer. So, you should harvest it more frequently in the spring and summer.

Use a sharp knife or scissors to cut the leaves

You can either cut the whole plant at the base, leaving about an inch of stem, or cut individual leaves from the outer part of the plant, leaving the inner leaves to grow.

You should cut the leaves about an inch above the soil, to avoid damaging the crown and the roots. Moreover, you should also avoid cutting too many leaves from one plant, as this will weaken the plant and reduce the yield. A good rule of thumb is to leave at least half of the leaves on each plant.

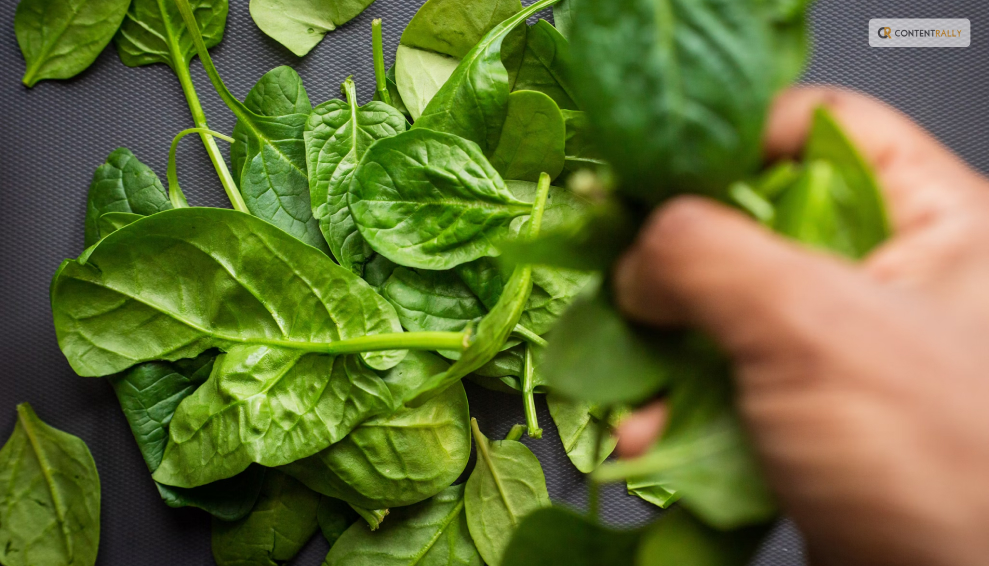
Wash and dry the leaves 

You should wash the spinach leaves as soon as possible after harvesting, to remove any dirt, bugs, or pesticides. You can use a colander or a salad spinner to rinse the leaves under cold water. After this, pat them dry with a paper towel or a cloth. Additionally, you should remove any damaged or yellow leaves, and trim any tough stems.

Enjoy or store the leaves

You can eat the spinach leaves fresh, or store them in the refrigerator or freezer for later use. We’ll explain how to store and freeze spinach in the next sections.

How to Harvest Spinach Seeds?

How to Harvest Spinach Seeds_

If you want to save some spinach seeds for the next season or share them with your friends and family, you must let some spinach plants bolt and produce flowers and seeds. Here are the steps to follow to harvest spinach seeds:

Select the best plants to save seeds from

It would be best if you chose healthy, vigorous, and productive plants with the desired characteristics. Some of these are the flavor, size, color, and disease resistance.

Apart from these, you should also avoid saving seeds from hybrid varieties, as they will not produce true-to-type plants. You should look for open-pollinated or heirloom varieties, which will produce plants that are similar to the parent plants.

Isolate the plants to prevent cross-pollination

Spinach is a wind-pollinated crop, which means that it can cross-pollinate with other spinach plants or related plants, such as beets, chard, or quinoa, within a distance of up to a mile. This can result in seeds that have different traits than the parent plants. To prevent cross-pollination, you should isolate the plants you want to save seeds from, by either planting them far away from other spinach plants or related plants, or covering them with a mesh bag or a cage.

Let the plants flower and set seeds

You should let the plants bolt and produce flowers, which are small and yellow, and then wait for the seeds to form and mature. The seeds are round and black, and they are enclosed in a spiny husk. The seeds are ready to harvest when they are dry and hard, and the husks are brown and brittle, usually about four to six weeks after flowering.

Harvest and clean the seeds 

You should cut the seed stalks and place them in a paper bag or a bucket, and then shake or rub them to release the seeds from the husks.

Furthermore, you should then winnow the seeds, which separates the seeds from the chaff or the husks and other debris. You can do this by blowing or fanning the seeds or using a screen or a sieve. You should end up with clean and shiny seeds.

Store the seeds

It would be best if you stored the spinach seeds in a cool, dry, and dark place, such as a jar, a tin, or a plastic bag. You should also label the seeds with the variety name and the date of harvest. Besides, you can store the spinach seeds for up to five years, but they will germinate better if you use them within two to three years.

How to Store and Freeze Spinach?

How to Store and Freeze Spinach_

Spinach is best eaten fresh, as it loses its flavor and texture quickly. However, if you have a large harvest, or you want to preserve spinach for later use, you can store or freeze it. Here are the best ways to store and freeze spinach:

Store spinach in the refrigerator 

You can store fresh spinach in the refrigerator for up to a week if you keep it in a perforated plastic bag or a container with a lid. However, you should avoid washing the spinach before storing it, as this will make it wilt faster. You should wash the spinach just before using it.

Freeze spinach raw

You can freeze raw spinach without blanching it, which is a process of briefly cooking and cooling the vegetables to stop the enzyme activity that causes them to spoil. However, freezing raw spinach will result in a mushy and watery texture and a loss of flavor and nutrients. To freeze raw spinach, you should wash and dry the leaves, and then pack them in freezer bags or containers, leaving some space for expansion. You can freeze raw spinach for up to six months, and use it in smoothies, soups, or casseroles.

Freeze spinach blanched

You can freeze blanched spinach, which will retain its color, texture, flavor, and nutrients better than raw spinach. To freeze blanched spinach, you should wash and trim the leaves, and then blanch them in boiling water for one to two minutes, depending on the size of the leaves.

You should then drain and cool the leaves, and squeeze out the excess water. You can then pack the leaves in freezer bags or containers, leaving some space for expansion. Furthermore, you can freeze blanched spinach for up to a year, and use it in salads, sandwiches, or quiches.

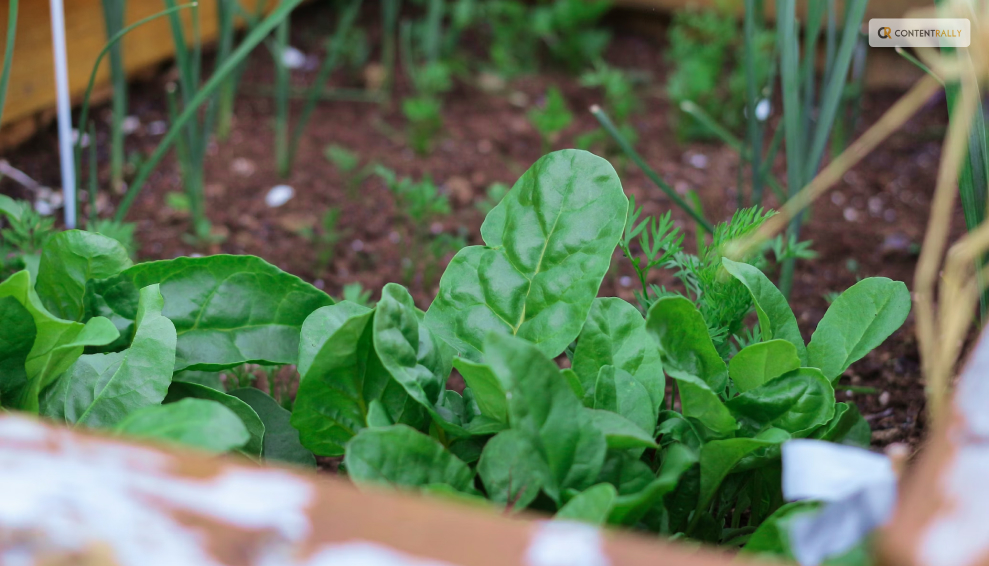
Things to Keep in Mind: How to Grow Spinach Successfully?

Things to Keep in Mind_ How to Grow Spinach Successfully_

Spinach is a cool-season crop that grows best in the spring and fall, when the temperatures are between 40°F and 75°F. It can tolerate light frost but not heat or drought. Spinach also prefers moist, fertile, and well-drained soil with a pH of 6.0 to 7.0. Here are some tips and tricks on how to grow spinach successfully:

Choose the right variety

There are many types of spinach, but the most common varieties are savoy, semi-savoy, and flat-leafed. Savoy spinach has dark green, crinkly leaves that are great for salads and wraps. Semi-savoy spinach has slightly curled leaves that are more resistant to diseases and bolting. Flat-leafed spinach has smooth, broad leaves that are easy to clean and process. You can also choose spinach varieties based on their maturity time, bolt resistance, flavor, and color. Bloomsdale, Tyee, Space, Melody, and Red Kitten are popular spinach varieties.
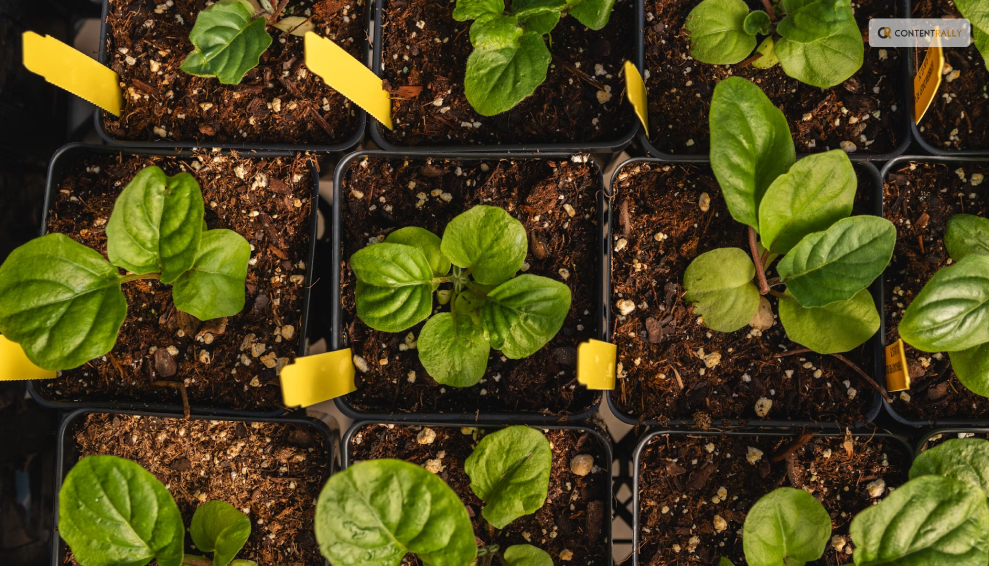
Sow the seeds 

You can sow spinach seeds directly in the garden, or start them indoors and transplant them later. The best time to sow spinach seeds is in early spring, as soon as the soil can be worked, or in late summer or early fall, for a winter harvest. You can also sow spinach seeds every two to three weeks, for a continuous harvest.

Besides this, you should sow the seeds about half an inch deep, and one to two inches apart, in rows that are 12 to 18 inches apart. You should water the seeds well, and keep the soil moist until they germinate, which usually takes seven to 14 days.

Thin the seedlings

When the spinach seedlings have two to four true leaves, you should thin them to avoid overcrowding and competition. You should leave about four to six inches of space between each plant, and eat or transplant the thinned seedlings. You should also weed the area around the spinach plants regularly, to prevent pests and diseases.

Harvest the leaves

Depending on the variety, you can start harvesting spinach leaves when they are big enough to eat, usually about 25 to 50 days after sowing. You can either harvest the whole plant or pick individual leaves from the outer part of the plant, leaving the inner leaves to grow.

Additionally, you should harvest spinach in the morning, when the leaves are crisp and fresh, and before the sun gets too hot. You should also harvest spinach before it starts to bolt, which is when it produces flowers and seeds, and becomes bitter and tough.

How to Use Spinach in Different Cuisines and Recipes?

How to Use Spinach in Different Cuisines and Recipes_

Spinach is a versatile vegetable that can be used in many different cuisines and recipes. Whether you want to make a salad, a soup, a pasta, a pie, or a smoothie, spinach can add flavor, color, and nutrition to your dish. Here are some examples of how to use spinach in different cuisines and recipes:

Mediterranean cuisine

Spinach is a staple ingredient in many Mediterranean dishes, such as spanakopita, a Greek pie made with spinach and feta cheese wrapped in phyllo dough, or spinach and chickpea stew, a Moroccan dish flavored with cumin, paprika, and lemon juice. You can also make a simple spinach salad with tomatoes, olives, and feta cheese, dressed with olive oil and vinegar.

Asian cuisine

Spinach is widely used in Asian cuisine, especially in Chinese, Japanese, and Indian dishes. You can make a Chinese spinach and tofu stir-fry with garlic, ginger, soy sauce, and sesame oil, or a Japanese spinach and sesame salad with rice vinegar, sugar, and soy sauce. You can also make an Indian spinach and potato curry with onion, garlic, ginger, turmeric, and garam masala, or a spinach and paneer cheese dish with cream, tomato, and fenugreek.

Italian cuisine

Spinach is a common ingredient in Italian cuisine, especially in pasta, pizza, and lasagna. You can make a spinach and ricotta ravioli with butter and sage sauce, or a spinach and mushroom pizza with mozzarella and parmesan cheese. You can also make a spinach and cheese lasagna with béchamel sauce, or a spinach and artichoke dip with cream cheese and sour cream.

American cuisine 

Spinach is also popular in American cuisine, especially salads, sandwiches, and casseroles. You can make a spinach and strawberry salad with almonds and poppy seed dressing or a spinach and bacon sandwich with mayonnaise and mustard. You can also make a spinach and cheese casserole with eggs, milk, and breadcrumbs, or a spinach and artichoke quiche with pie crust and cheddar cheese.

Wrapping It Up!

Spinach is a wonderful vegetable that you can harvest, store, and use in various ways. It’s easy to grow, harvest, and store spinach, as long as you follow some simple steps and tips. It’s also healthy, delicious, and versatile, as you can use it in many different cuisines and recipes. Spinach is a green treasure that you don’t want to miss.

If you want to know about how to harvest spinach, I hope that this blog has been of help to you. If there are any other queries related to the same, please feel free to let me know. All that you need to do is scroll down till you reach the bottom of the page. Then, leave your comments and suggestions in the box below. And I will be ether to answer them all for you.

Read Also:

Ankita Tripathy loves to write about food and the Hallyu Wave in particular. During her free time, she enjoys looking at the sky or reading books while sipping a cup of hot coffee. Her favourite niches are food, music, lifestyle, travel, and Korean Pop music and drama.

View all posts

Leave a Reply

Your email address will not be published. Required fields are marked *

Related

Biophilic Home Design

Exploring Ideas For A Biophilic Home Design

Biophilic design has become a popular global interior design trend. Pinterest Business reported a 100% increase in searches for "biophilic design bedroom" between 2019 and 2021.  This design approach is rooted in biophilia, humans' innate affinity with the natural world.  Moreover, it has practical applications in design. Research indicates that it can positively affect productivity and well-being.  For instance, a study showed that people spent 11% more time in biophilic-inspired hotel lobbies.  Similarly, schools in Washington State saw a 5% increase in student test scores and a 15% reduction in absenteeism with a biophilic design approach. Let us explore what interior designers suggest for a biophilic home and ideas that you must explore! Understanding Biophilic Home Designs The modern world of technology has taken a new direction towards nature. Robotics, AI, and the Internet of Things (IOT) have caused urban architects to incorporate biophilic designs.  These designs involve greenery and natural elements. It helps to improve air quality, airflow, circadian rhythm, heart rate, and human health.  Biophilic designs stimulate visual connection and enhance the multi-sensory experience using indoor plants and natural patterns.  Stephen Kellert and Edward O. Wilson, who founded biophilic designs, have made nature feel more accessible at home. He incorporates plants, sunlight, natural materials, and fresh air. How To Make Your Home Biophilic? Given below are the different aspects that you can add to your home for a biophilic design— Add Plenty Of Greens Integrating plants into your interior design can create a natural and inviting ambiance. Adding greens helps enhance the aesthetic aspects of a biophilic home, ensuring a calming environment. Moreover, indoor plants help purify the air inside your home. However, this does not necessarily mean you must go overboard and transform your home into a tropical paradise.  You can opt for potted plants, hanging baskets, or even a simple vase with fresh-cut flowers. Match your live elements with the color scheme of your decor. Most home designing experts advise you to get more succulents for your home. These plants require less watering but look amazing in every setting. Alternatively, nature-inspired artwork, botanical prints, or murals can bring the outdoors in.  The idea is to create a synergy between the artificial environment and the natural world. This home design can positively impact your mood, health, and well-being.  Therefore, incorporating natural elements into your interior design can create a more harmonious and balanced living. This biophilic element can be functional and beautiful at the same time. Enable Natural Lighting Incorporating natural light into interior spaces has numerous benefits.  Biophilic design emphasizes the connection between humans and nature. Therefore, it prioritizes light and space to create a healthier, harmonizing, and more comfortable environment.  Biophilic home designs use different components of warmth and sunlight. Natural light can blend the boundaries between the interior and exterior of a space.  For instance, large windows and skylights can allow sunlight to stream in, making a space more open and inviting. Additionally, glass roofs and walls allow you to save electricity with natural lighting during the daytime.  If you can reduce your exposure to artificial lighting, you say goodbye to stress and fatigue. It helps invigorate the body and mind.  Therefore, we can design spaces incorporating biophilic principles to improve our well-being and strengthen our connection to nature. It creates spaces that promote well-being and encourage a greater appreciation for the natural world. Use Organic Decor Items Biophilic design is a concept that aims to connect people with nature by incorporating natural elements into the built environment.  To create a peaceful atmosphere and promote a sense of well-being in your home, incorporate natural materials like leather, wood, and stone for your decor items. This brings a natural touch to the textures, colors, and forms around your home.  Furthermore, using subdued and organic color schemes can also help to enhance the calming and stress-reducing properties of biophilic design. Handcraft your decor with jute ropes,  Therefore, you can create an affordable and easy-to-maintain space with these decor items. That is aesthetically pleasing and enhances your physical and mental health. Maintain The Patio Biophilia is an evolutionary concept that suggests humans have an innate affinity for nature. This idea is gaining traction in outdoor architecture and design as well. Biophilic design is a concept that aims to create a connection with nature and its resources. To achieve this in your outdoor space, you can incorporate some major additions like the following: Eco-friendly composite decking. Vertical gardens. Green screens in small spaces.  Native plants can help support wildlife and blur the boundaries between the territory and nature. Therefore, it is essential to consider factors such as sunlight exposure and irrigation when selecting plant species for your patio.  Furthermore, incorporating water elements like fountains or cascades can help create a tranquil atmosphere.  It is also important to choose outdoor furniture inspired by nature instead of plastic. Install fire pits made of natural materials like stone or metal. This can help create a comfortable and inviting outdoor biophilic space.  Let The Air Flow Achieving a biophilic home design involves paying attention to the air circulation within each room.  You can start by determining the direction of the wind around your home. Next, open your windows accordingly to facilitate the flow of fresh air.  Additionally, you can enhance the airflow in your home by ensuring that your rooms are spacious and free of clutter.  Consider using furniture that provides ample storage space to keep your rooms organized and uncluttered. This allows the air to circulate freely throughout your home.  By creating a well-ventilated and spacious environment, you can enhance the biophilic design of your home. Therefore, bring nature indoors and improve your overall well-being. Add Water Features Adding water features like cascades, fountains, or reflecting pools to your outdoor space can incorporate a biophilic design. It helps create a serene atmosphere.  The sound and sight of water can instantly transport you to nature and induce a feeling of tranquility and relaxation. You can go for a small pond or stream in your backyard if you have a generous budget. This addition can create a more natural and immersive experience.  However, a small water fountain in your garden, patio, or deck can do the trick if you prefer a simpler option.  It's a quick and easy way to add elegance and calmness to your outdoor space! Wrap It Up With A Fire Pit Adding a fire pit to your outdoor space can significantly impact its ambiance and appeal.  By creating a warm and inviting atmosphere, fire pits can make your outdoor area a more comfortable and enjoyable place to spend time.  Furthermore, fire is a natural element that can uniquely evoke feelings of tranquility and connection with nature.  Therefore, incorporating a fire pit into your outdoor design can help create a biophilic environment that promotes relaxation and well-being. Read Also: Enhancing Spaces With Greenery: The Art Of Plant Styling In Interior Design 6 Interior Design Tips to Make Your House a Home Top 5 Interior Designers from Singapore

READ MOREDetails
Pack For Temporary Storage

More Motivation, Less Distraction: How To Pack For Temporary Storage

You’re among one of the thousands of Americans who find themselves faced with packing for temporary storage. You're not alone... Maybe you're staging your home for a quicker sale, making room for a home office or a temporary classroom amid the Pandemic, or desire the peace of mind that comes from a space that is free of clutter. With so many changes in the worldwide landscape, self-storage has become an asset to homeowners and apartment dwellers. Temporary storage offers flexibility while creating room in your home and free space in your mind. All of those distractions not only lead to lower productivity but also lead to feelings of overwhelm that disempower us from reaching our goals. Feeling encumbered by stuff is a growing trend since so many of us are faced with how many things we actually have during a shelter in place! The good news is that by utilizing temporary storage, you don't have to wait for a bigger home to create that spacious feeling. Whether you're packing for temporary storage due to a transition in your personal life, or just want to free up some space in your home in you home, it can feel overwhelming to do the research necessary to begin the process. How To Pack For Temporary Storage? Here is a full-step guide to pack for temporary storage. read the points below to know everything about it in detail. Clearing some space in your home would also help you concentrate on doing something meaningful to your life. Step 1: Assess the space you have Create a flow in your home.  Your things should fit neatly into the space you have. Although it may be tough to decide what you need, storing things offsite means that your stuff is not gone forever! Get Rid of the clutter! Clutter can be overwhelming to deal with when starting to pack your belongings for storage. Once it's out of the way, it makes the packing process so much easier. Even a few hours of decluttering can make things run a lot smoother. Try getting the family involved, and make it a game! Read Also: Moving home checklist: What you need to know Step 2: Categorize & Inventory Making lists as you categorize your items for temporary storage will make it easier for you to find them as you need them. As you gather items from each category, make a list, or take a photo of what you pack in each box. Label your boxes with a number, and mark your photograph or list with the same number for a visual index. Having a list and documentation is also an asset in the event that an unfortunate or unexpected event should occur and you need to file an insurance claim. Things you use seasonally Your surfboard, your kid's inflatable pool, or your Bermuda shorts won't be of much use when it's snowing outside! Group all seasonal items by season, including decorations, clothing, and footwear together. When these items are packed together, and labeled, it's so simple to swap out a few boxes at the change of season. Sentimental Items You Don't Need Right Away High School Yearbooks, Stacks of your kid's artwork, and other items that have value but are rarely used in daily life can be prepared for temporary storage, so you can access them when you need them! Things You Need, Just Not Right Now Heirloom furniture, boxes of books, or clothes -you're saving for the next baby can all be stored off-site! Step 3: Gather Materials and Pack Following your inventory, pack items of each category together following these instructions for the safekeeping of your items. When packing, it is important to consider that life changes quickly, and although you are packing for temporary storage, you may enjoy the spaciousness this brings and decide to keep your items packed away longer than 3-4 months! Packing items to be stored indefinitely not only safeguards your items but can offer you peace of mind in the event that plans change. Since things often take longer than expected, you can rest assured knowing that your valuable items are safe. Be sure to use sturdy boxes, and always, always make sure the bottom is taped securely shut! Don’t overpack boxes, and make sure boxes can be comfortably lifted and moved. Pack lighter items on the top so they do not crush the contents beneath them. Fill any empty space in the box so it does not collapse. Furniture Clean each piece of furniture, removing any dust, debris, or food remnants. Condition any wood or leather items, and be sure to vacuum all upholstery. Disassemble any furniture. Often the assembly instructions are long gone, so it is helpful to take photos of each step along the way, documenting hardware as you go. When it comes time to reassemble, you can review your photos in reverse, making reassembly a breeze! Use a drop cloth, or moving blankets, wrap your items carefully for transport and storage. While bubble wrap is useful for protecting mirrors and glass, avoid using plastic coverings directly on your furniture. Plastic can trap moisture, which can cause wood to warp and upholstery to mold or mildew. Use only white drop cloths to cover wood or upholstery, as the dyes can bleed in humid environments leading to discoloration of your furniture. Electronics Remove any dust or debris from the item using a dry cloth. If you are storing an electronic device that stores data, be sure to back up any important information before packing it away. Secure packing of electronics is so important! In the event of any bumps or drops, you can be at ease knowing your electronics are secure in their packaging. Remove all cords, and wind them into a circle, securing with a tie. If possible, pack electronic items in their original packaging. If that is long gone, use a box slightly larger than your item, and create a shock-absorbing buffer firmly around the item using packing peanuts or styrofoam. Avoid using any plastics that will trap moisture, and be sure to include several silica packs to absorb any humidity. Always keep your electronics upright. Mark an arrow on the box with the correct direction to ensure that your item is stored and transported safely. Once your device is placed securely in the box, you can place the corresponding cords on top of the packing, and tape your box closed securely. Clothing & Specialty Worn Items Books, Papers, and Photographs Since mold is a common issue when storing books, and papers, it's recommended to ensure they are totally dry. If you live in a humid climate. Paper objects can be stored in smaller, opaque plastic totes to ensure they are kept free from moisture and light, and rodents. Pack larger books lying flat, and store smaller books upright, as you would on your bookshelf. Never store a book on its spine, as it can cause damage to the structural integrity of the book and damage it. Protect your photographs by storing them in an archival album before storing to ensure your photos will be around for generations. To store larger photographs, carefully place them between layers of cardboard, and lie flat. Instruments, Art, and Other Delicate Objects To properly store delicate objects, it is important to have a facility tha is climate controlled, even for temporary storage. Make sure all packing is secure, keeping packing materials out of direct contact with any painted areas, wood accents, or delicate features. You May Also Like: Small Kitchen Storage Ideas Step 4: Finding A Storage Space It can be difficult to conceptualize how much storage space you actually need. Many self-storage websites offer guides that can help you visualize how your things will fit in the space. Some storage units are multi-level, so be sure to ask about accessibility if you need a space that is on the ground level. If you are storing any sensitive items like instruments, electronics, or antiques, be sure to rent a climate-controlled unit. When people think of storage, the image that comes to mind is often a traditional storage facility. While traditional storage is an excellent option for many, there are alternatives that can offer some flexibility, convenience, or some sizable savings. Maybe you have a spare vehicle that never gets used sitting in your garage. Consider storing your vehicle, renting extra space from someone in your neighborhood, or asking a family member or friend to store belongings for you.

READ MOREDetails
Appliance Repair Process

Appliance Repair Process Getting Your Appliances Back In Top Shape

In today's fast-paced world, household appliances have become an integral part of our lives. From refrigerators to washing machines, these appliances simplify our daily chores, making our lives more convenient. However, like any other machine, appliances are prone to wear and tear over time.  When your trusty appliance breaks down, it can disrupt your routine and be a source of frustration. But fear not! In this article, we'll walk you through the appliance repair process, helping you understand what to expect when seeking professional appliance repair services. Appliances can malfunction for various reasons, such as wear and tear, electrical issues, or mechanical failures. When your appliance starts acting up, the first step is to identify the problem accurately. This is where professional appliance repair toronto downtown services come into play. Basic Aspects Of The Repair Process Repair of electronic appliances is quite a comprehensive process. It will be an expansive discussion. This is the reason people try to ensure that they give the work to experts. However, let's try to understand them here in brief to gather a clear idea on the subject.  1. Saving Money  Electronic appliances, especially quality ones, usually serve customers with satisfaction. However, after theft, they face some issues, and consumers generally make the decision to replace it with a new one. But if you are investing to get a new machine, you have to spend a lot of money. It can entirely derail your budget. Why not get them repaired? Repairing these malfunctioning gadgets saves you extra dollars.  2. Convenience One of the great benefits of repairing the old appliance is the convenience. Be it the Television, washing machine, or some other gadget, you definitely have your convenience. You are used to this very quality. But sometimes the new gadgets or appliances fail to satisfy the consumers. Notwithstanding the expenditure, you may not be happy. Repairing an old appliance can make your life quite convenient.  3. Safety When an electronic appliance stops functioning, it may be unsafe for people, especially kids. These malfunctioning appliances can disrupt the electronic connection within the house. So to stop further damage to the appliance and maintain the safety of the people, you have to be mindful of the repair of your appliances. So, get these applications to the best of your understanding and ensure that you have them.  4. Assessment And Diagnosis The first process in this system is the assessment and diagnosis. First, you have to look at the types of issues that you are facing with your appliance. The problem requires the replacement of certain components. The problem may also have a link with repairs.  A. Identifying The Issue The initial phase of the appliance repair process involves identifying the root cause of the problem. Skilled technicians use their expertise to pinpoint the issue: a faulty motor, a broken thermostat, or a malfunctioning control board. B. Diagnostic Tools And Techniques Technicians utilize advanced diagnostic tools and techniques to ensure accurate problem identification. These tools help assess the appliance's functionality and determine the necessary repairs. 5. Choosing the Right Appliance Repair Service Appliances’ care is under your hand. If you take adequate care of your appliance right from the beginning, then it will help you increase the shelf life of your appliance. But when the appliance goes out of order, then, its better that you take the assistance of the right repair services. They are professionals and they will provide you with the best suggestion on wha exactly you have to do it fix the issue.  A. Research And Reviews Selecting a reputable appliance repair service is crucial. Conduct thorough research and read reviews to gauge the reliability and customer satisfaction of different service providers in your area. B. Credentials And Experience Ensure that the repair service you choose has certified technicians with ample experience in repairing appliances of various brands and models. C. Getting A Quote Before proceeding with the repair, request a detailed quote from the service provider. This should include the cost of parts, labor, and any additional charges. Related: How To Repair Home Appliances and Use Humidifiers 6. Repairing Your Appliance When you are repairing an appliance, you may have to replace one of many components. At the same time, you may do some repairing of that component and fix the problem. It will depend on not one but a group of elements.  Parts Replacement If your appliance requires replacement parts, the technician will use genuine components to ensure optimal performance and longevity. Repair Techniques Technicians employ effective repair techniques, ensuring that the appliance functions as good as new. These may include soldering, rewiring, or recalibrating components. Quality Assurance The longevity of the electric appliance depends primarily on not one but many elements. The electric appliance, whether it is a refrigerator or, say, a washing machine, branded goods generally offer better products. Quality repair  standards and their maintenance depend on some other elements and including; Testing And Inspection After repairing your appliance, thorough testing and inspection are carried out to verify that it's working correctly. This step ensures that the issue is fully resolved. The repair service with a good enough name and fame would always love to ensure zero tolerance towards any negligence.  Warranty And Guarantees Reputable repair services provide warranties and guarantees on their work. It also offers you peace that your appliance is in good hands. Warranty on the repair provides confidence to the people that their investment will not go to waste under any circumstances. Preventive Maintenance To avoid future breakdowns, performing preventive maintenance on your appliances is essential. Here are some tips: Clean filters and vents regularly. Check for loose or damaged wires. Schedule routine check-ups with a professional technician. Conclusion The appliance repair process may seem daunting when your valuable appliances malfunction, but with the right knowledge and a trusted repair service, you can have them back in top shape in no time. Remember to prioritize regular maintenance to prolong the lifespan of your appliances and minimize the need for repairs. Finally, take the assistance of an experienced repair services to save yourself from loss of further damage.  Read Also: Vampire Appliances And Electronic Costs Best Practices That Extend The Life Of Your Appliances How Can Appliance Repair Services Help You

READ MOREDetails