How To Approach Home Maintenance With A Focus On Well-Being

by

29 February 2024

Home & Garden

Home Maintenance

We all know, at least by intuition, that having our living spaces clean is important – and not just because of the visual appeal of it. Then, what are the main reasons why it’s so crucial for our lives? Sure, the look of a clean home, the convenience of finding things in their place, habits it helps us foster, and the sense of obligation – especially if you live with other people, all of them play their part. But, there’s something that really makes house cleaning vital: the link between it and our physical and mental well-being.

So, what aspects of health are we talking about here, and how exactly does keeping your home in shape make a difference? According to Hire A Maid and their team of seasoned experts in house cleaning, there are a few main health-related considerations that connect to the state of our living spaces. We’ll discuss them below, and then explain how to approach home maintenance with a focus on well-being.

What Are The Approaches Of Home Maintenance With A Focus On Well-Being

What Are The Approaches Of Home Maintenance With A Focus On Well-Being

There are a lot of approaches to home maintenance with a focus on well-being. In this case these approaches are quite suitable and feasible in terms of keeping your health nice and up to the mark. Below I am going to discuss the approaches of home maintenance with a focus on well-being. 

1) Germs & Contaminants

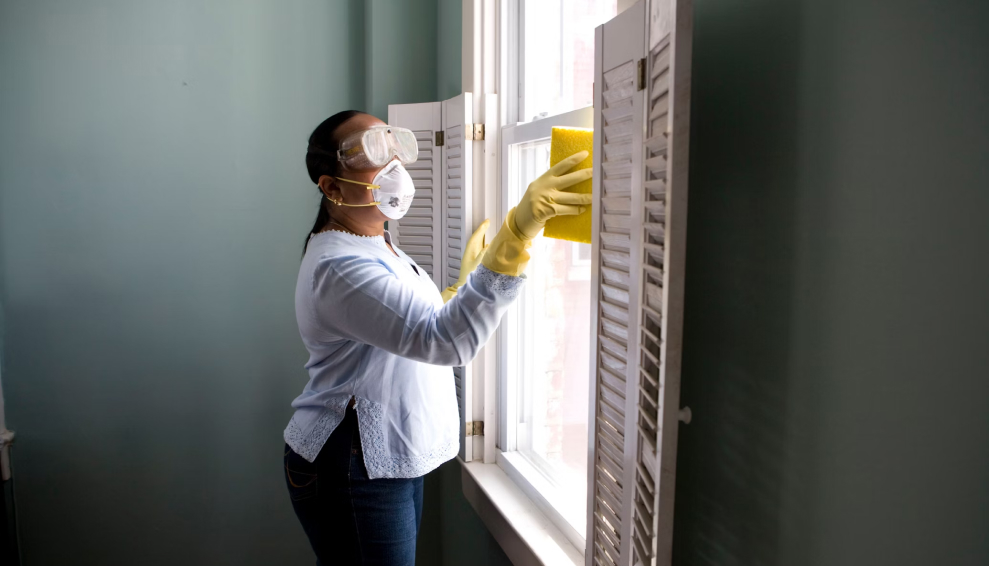
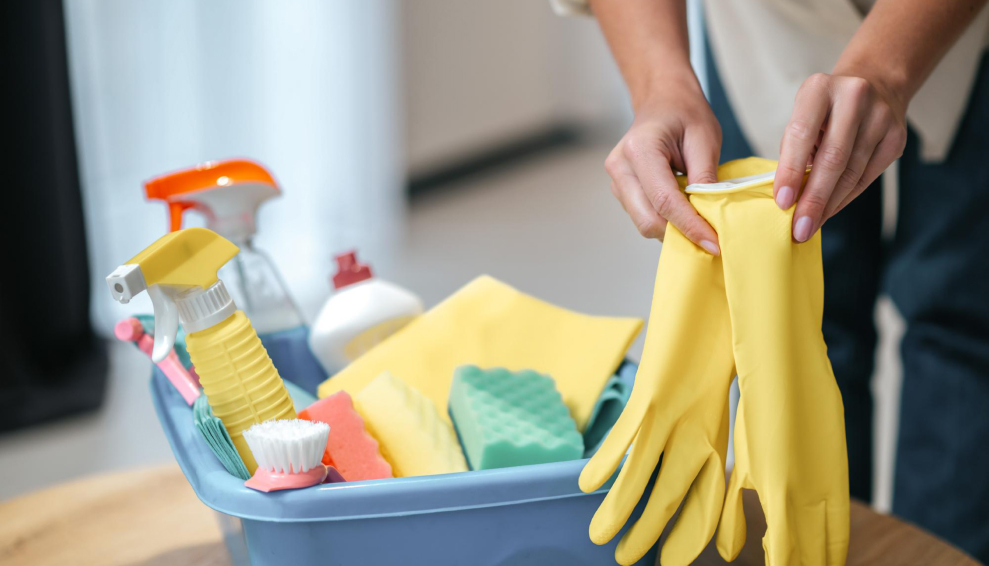
This one is pretty straightforward: cleaner space means fewer germs and other contaminants. Your goal shouldn’t be to live in a completely sterile bubble, it’s more the means to lower the chance of illness by keeping those pesky germs at bay, especially during flu season. 

To that end, you should regularly wipe and disinfect surfaces throughout your home and give extra attention to the high-touch ones. It’s a tried and tested way to keep yourself and your family safe. 

And don’t forget the kitchen and bathroom, where a combination of moisture and food particles creates ideal conditions for pathogens to thrive. To make sure all of these areas are regularly addressed, it’s best to craft a realistic cleaning routine – one that’s easy to stick to but still addresses all microbe-prone surfaces regularly. 

2) Allergens & Air Quality

Allergies are a common issue, one that many people unfortunately have to deal with even in the safety of their own homes. Allergy symptoms may be somewhat unpredictable, but luckily, it’s possible to lessen their grip on your day-to-day life. It’s quite simple really: regular cleaning reduces the amount of allergens the same way it reduces the number of germs. 

Dust is a common culprit for triggering reactions, along with dust mites. And even if you and your family members don’t suffer from allergies, dust and dust mites can irritate almost anyone. 

To reduce the amount of irritant particles and improve the quality of air in your home, focus on dusting regularly and efficiently, use a high-quality vacuum, and tackle upholstery, carpets, and bedding whenever possible.

3) Order & Stress Levels

Aside from being an eyesore, clutter can crowd your mind as much as your space. The hassle of moving around through the mess, a decrease in productivity – these are just some of the ways in which clutter and neglected cleaning tasks can add to your stress levels. 

Before you know it, it becomes a loop where the sight of the mess and the dread of having to address it feed into each other, making you feel increasingly overwhelmed. 

Tackling clutter is about reclaiming peace as much as it’s about reclaiming your space. Start small – a drawer, a shelf, a corner, and work your way through the home. If possible, rely on others for help, whether it’s family members or hiring a cleaning professional. Once everything is in order, brainstorm ways to keep clutter from creeping back in.

The ripple effects of a clean home on our well-being are extensive. Improved sleep, heightened concentration, and a general sense of wellbeing are all byproducts of a space that breathes cleanliness and order. Furthermore, the discipline and habits cultivated through regular home maintenance can translate into other areas of life, promoting a lifestyle that values mindfulness, health, and balance.

What Are The Monthly Home Maintenance Checklists?

What Are The Monthly Home Maintenance Checklists_

While this is about a monthly home maintenance checklist, preserving the property’s condition is essential. Below, I am going to discuss the monthly home maintenance checklists. 

1) Cleaning HVAC Filters 

While this is about adequately installed HVAC filters, this will help you breathe easily in your home. This further ensures that your cooling and heating systems will also work efficiently. 

2) Test Smoke Alarms 

Always ensure that smoke detectors are functional in the home. This is a key feature for early detection in handling several other safety hazards. On the other hand, you must replace such batteries every six months to keep consistent and reliable operations. 

3) Clearing Drains and Sinks 

Always ensure that you are regularly clearing sinks and drains. These will prevent the inconvenience and chaos of several other clogs. 

4) Examining Electrical Cords 

Always examine several electrical cords. In this case, you must inspect the cables for frayed wires, or else you will lose the connections, which would prevent the electrical hazard. 

5) Lubricating Door Locks and Hinges 

Always lubricate the door hinges and locks to prevent doors from further squeaking. This ensures the smoother operations of several other locks. 

6) Cleaning Gutters And Downspouts 

After regularly purging the blockages and water damage, you might get a flawless water service across the entire washroom. 

7) Checking Plumbing For Leaks

Always ask the plumber to detect leaks as early as possible. This will save and prevent money along with extensive damage. Ensure you check the shower heads, plumbing, and faucets for such leaking to avoid headaches. It takes work to handle this kind of service, especially every season. 

What Are The Four Types Of Maintenance Strategies That You Must Know? 

What are the four types of maintenance strategies that you must know_

Did you know that predictive maintenance is about rapidly gaining and sparked by several other advancements across the IIoT? Below, I will discuss four types of maintenance strategies you must know. 

1) Reactive Maintenance 

After all, reactive maintenance is quite simple as it can fix several other things they usually break. Since repairs still need to be planned. Ultimately, this is a suitable method in which you can employ equipment that is optional for operations. Or else this has a low cost. 

2) Preventive Maintenance 

Another one of the most suitable approaches, which entails periodically pausing the operation of assets, is preventive maintenance. One of the main objectives of this maintenance is to enhance the lifespan of assets. 

3) Reliability Centered Maintenance

After all, reliability-centered reliability-centered maintenance acknowledges equipment failure, which is not always unpredictable. This delves deep in terms of analyzing each equipment’s potential failure patterns. This is also applicable to craft a tailored maintenance plan. 

4) Predictive Maintenance

Did you know that predictive maintenance is a vibration of analyzing a sensor that might warn of an impending malfunction? This prompts inspection, and this would also be feasible for timely repair.

In Conclusion

It’s clear that the benefits of regular home maintenance go beyond the surface. Fighting off germs, clearing the air from allergens, reducing stress levels – the impact on well-being is undeniable. It’s all about including mindful cleaning habits into your life, for the sake of your and your family’s well-being. So, embrace these tasks, rely on a routine, don’t hesitate to ask for help tackling them, and enjoy a living space in which you can thrive.

I hope you liked this article!

Read Also:

Ankita Tripathy loves to write about food and the Hallyu Wave in particular. During her free time, she enjoys looking at the sky or reading books while sipping a cup of hot coffee. Her favourite niches are food, music, lifestyle, travel, and Korean Pop music and drama.

View all posts

Leave a Reply

Your email address will not be published. Required fields are marked *

All Comments

Normally I do not read article on blogs however I would like to say that this writeup very forced me to try and do so Your writing style has been amazed me Thanks quite great post

Related

Water Filter Pitcher

The 5 Best Brita Alternatives For Water Filter Pitchers

A water filter pitcher is something everyone should have in their home. It’s one of the simplest ways to guarantee that the water you’re drinking is clean, safe, and deliciously chilled. Unfortunately, getting a great water filter pitcher isn’t as easy as you might think. Popular brands like Brita do a great job of filtering out substances like chlorine thanks to their activated carbon filters; however, they’re far from comprehensive. The fact is, mass-produced, store-bought water filtration systems are a far cry from true filtration options. They’re limited by their simple filter media and only work when it comes to high-turbidity contamination—lots of suspended solids. These filters do almost nothing to neutralize VOCs or microbiological threats. If you’re on the lookout for a water filter pitcher, you can do better than Brita. Here are a few of the best Brita alternatives for water filter pitchers and why they’re worth the investment. 1. Aquaspace® Carafe® Pitchers You might not even need to finish this list, because we’ve put the very best Brita alternative front and center, right at the top. There’s simply no beating the performance of Aquaspace® Carafe® Pitchers! Not only are there options for specific filtration such as fluoride, but there are also alkaline options for those who prefer the benefits of water with a slightly higher pH. The specifications of these filters are second-to-none when it comes to filtration capabilities. First, there’s an amazing 500-gallon capacity on Aquaspace® filters—as opposed to a meager 40 gallons on most Brita systems. On top of this, there’s filtration power to consider. The Aquaspace® filter goes above and beyond any activated carbon filter, to deliver comprehensive filtration that spans both organic and inorganic compounds. Need more proof that Aquaspace® comes out on top? Look at the pour-through funnel to the filter media, which ensures powerful filtration, instead of pass-through sieve filtration. If you’re going to spend the money on a water filter pitcher, there are few better options than Aquaspace®. 2. Pūr Classic 11-Cup Pitcher One of the competitors to Brita that you’re likely to find in stores is Pūr. This brand is mass produced, but its filter media is a step above others on the market. It doesn’t just rely on activated carbon media; its MAXION® filter technology also addresses pharmaceuticals and industrial pollutants to provide a more encompassing level of cleanliness to water. Like other store-bought filters, Pūr has some bells and whistles that make it worth looking at—including the LED filter indicator. While the filter lifespan is only a meager 40 gallons, an LED reminder will let you know when it’s time to swap in new media. Moreover, the filters themselves are relatively inexpensive. One of the best things about this water filter pitcher is its convenience. It has a relatively low cost of ownership and is easy to fill, pour and clean. It’s also BPA-free. If you’re shopping in-store, it’s hard to do better than Pūr. 3. Travel Berkey Gravity-Fed Water Filter If price isn’t an option, the Travel Berkey Water Filter is worth a look. We’re not kidding when we say it’s pricey, though—you’re looking at a $250 purchase price and $120 replacement filters. If you’re reading this aghast, take a moment to consider the benefits. First off, the Travel Berkey Water Filter and its filtration media will cleanse up to 6,000 gallons before you need to replace the filters. This is enough to justify the cost of the filters themselves. As for the cost of the unit, it’s probably the most well-made on this list and features stainless steel that’ll last you a lifetime. The system itself is also a gravity-fed setup, which means you can expect superb filtration and extremely clean drinking water. Outfitted with the right filters, it’ll eliminate just about any contaminants in your water, including arsenic. The downfall of this system? Well, it’s not exactly a pitcher and you can’t keep it in the fridge. It’s meant as a countertop option that holds 1.5 gallons, which makes it equally as convenient. 4. ZeroWater 6-Cup Pitcher If you live in an area with heavy lead content in the water supply, this pitcher is an upgrade over Brita filters. While it only boasts a 6-cup capacity, the filtration power of the ZeroWater filter pitcher is well-worth the extremely affordable $20 price tag. Thanks to its five-stage filtration capabilities, this pitcher does what only activated carbon filters can’t. Aside from the usual hard water culprits, this system also filters out compounds like fluoride, nitrates and other inorganics. This, in conjunction with its ability to filter out most unwanted organic compounds like arsenic and mercury. It’s one of the best filtration systems for the cost. The unfortunate aspect of the ZeroWater filter pitcher is its 20-gallon filter lifespan. If you’re relying on it frequently, you could end up spending a fortune in filter replacement costs. This is an option best left for those who also have some point-of-use filtration system. 5. Clearly Filtered 10-Cup Pitcher While its claim of being “the most powerful water pitcher on the market,” might be a little dubious, the Clearly Filtered pitcher is certainly a leader in its class. Sure, you’re going to spend more than the off-the-shelf filters on this list, but you’ll also get better performance. First, you’ll love the 100-gallon filter capacity on this model. This, in combination with its powerful filtration capabilities, makes it a great everyday option. Its 10-cup capacity means you’ll need to replace the filter roughly every 10 times you refill it. When it comes to filtration quality, expect this system to remove more than 230 unwanted organics and inorganics, including fluoride, lead, plastics, hormones, and more. It’s a truly encompassing filtration option. The only real downfall of this pitcher is that it’s a bit bulky and can be difficult to fit into a small fridge. Replacement filters aren’t cheap, either ($50), but they do offer good value thanks to their longevity. Pay Attention to Pitcher Performance When selecting a water filter pitcher, the best way to understand what you’re getting for your money is to look at the specifications of the product. What type of filter media does it use? How quickly does it filter? What’s the filter lifespan? These factors all matter when it comes to the clarity and safety of your water. At the end of the day, a water filter pitcher is all about convenience—and health. When you pull that pitcher out of the fridge and pour yourself a refreshing glass of crisp, cool water, you should be able to enjoy every sip. It starts by having confidence in the filter pitcher you’ve chosen. Looking for the best water filter pitcher available on the market? Look to Aquaspace for all your filtration needs! Read Also: How Many Jobs Are Available In Real Estate Investment Trusts? 2021 0123Putlockers And Servers – Watch Movies Online

READ MOREDetails
how to harvest basil

Everything You Need To Know About Harvesting Basil!

Basil is one of the most popular and versatile herbs you can grow in your garden or indoors. It has a fresh and aromatic flavor that can enhance any dish, from salads and soups to pizzas and pastas. Basil is also rich in vitamins, minerals, and antioxidants just like cilantro. It can benefit your health and well-being. But how do you harvest basil properly so that it keeps growing and producing more leaves?   If these are some of the things you want to know, I have you covered! In this article, I will answer all these questions and more and give you everything you need to know about harvesting basil! So, keep on reading this blog till the end to learn more…  How to Harvest Basil Leaves? The first thing you need to know about harvesting basil is when to do it. The best time to harvest basil leaves is in the morning when the plant is still fresh and moist. Avoid harvesting basil in the afternoon or evening when the plant is dry and wilted. Also, avoid harvesting basil when it is raining or wet, as this can cause the leaves to rot or mold. Steps to Harvest Basil Leaves To harvest basil leaves, you will need a pair of scissors or a sharp knife and a basket or a bowl to collect the leaves. You can also use your fingers to pinch off the leaves, but be careful not to damage the stem or the plant. Here are the steps to follow: Start from the top of the plant, and look for the stems with leaf clusters. These are called the terminal buds, and they are where the basil flowers will grow. You want to remove these buds, as they will make the plant stop producing new leaves and focus on flowering and seeding. This will reduce the flavor and quality of the basil leaves. Cut or pinch off the stem just below the terminal bud, leaving about a quarter of an inch of stem above the next pair of leaves. This will encourage the plant to grow two new stems from the leaf nodes and produce more leaves. You can also cut or pinch off any other stems that are too long or leggy and leave about four to six pairs of leaves on each stem. Repeat this process for all the stems that have terminal buds, and collect the leaves in your basket or bowl. You can also harvest some of the lower leaves but leave enough leaves on the plant to allow it to photosynthesize and grow. You should not harvest more than a third of the plant at a time, as this can stress the plant and reduce its growth and health. After harvesting, rinse the leaves with water and pat them dry with a paper towel. You can use them fresh or store them for later use. How to Harvest Basil So It Keeps Growing One of the benefits of harvesting basil is that it stimulates the plant to grow more leaves and branches and prevents it from flowering and seeding. However, you need to harvest basil regularly and correctly, so that it keeps growing and producing more leaves. Here are some tips to follow. For instance, you must harvest basil: At least once every two weeks, or more often if you see the terminal buds forming. This will keep the plant bushy and compact and prevent it from becoming woody and bitter. From different parts of the plant, and not always from the same spot. This will ensure that the plant grows evenly and does not become lopsided or uneven. Before it flowers. This is because the flowers will reduce the flavor and quality of the leaves. If you see any flowers forming, remove them as soon as possible. You can also pinch off the flowers and use them as edible garnishes or decorations, as they have a mild and sweet flavor. Before the frost, as the cold weather will kill the plant. You can either harvest the whole plant and store it for later use, or bring it indoors and keep it in a sunny and warm spot. You can also propagate the plant by taking cuttings and rooting them in water or soil and grow new plants for the next season. How to Harvest Basil Without Killing The Plant? Harvesting basil is different from harvesting lettuce or other plants. The process is good for the plant and you, as you can enjoy the fresh and aromatic leaves in your dishes. However, you need to be careful not to harvest too much or too often, as this can harm and kill the plant. Here are some dos and don'ts of harvesting basil without killing it: Do harvest basil from the top of the plant, not the bottom or the middle. This will allow the plant to grow stems and leaves from the lower nodes and maintain its shape and structure. Don't harvest basil from the main stem or cut it too close to the ground. This will damage the plant and prevent it from growing new stems and leaves. Leave at least four to six pairs of leaves on each stem and about an inch of stem above the ground. Do harvest basil gently and carefully, and not roughly or forcefully. This will avoid injuring the plant and exposing it to diseases or pests. Use a sharp and clean tool, such as scissors or a knife, and make clean and smooth cuts. You can also use your fingers to pinch off the leaves but be gentle and precise. Don't harvest basil when it is stressed or unhealthy, such as when it is wilting, yellowing, or diseased. This will weaken the plant and make it more susceptible to further damage. Wait until the plant recovers and looks healthy and green before harvesting. You can also water and fertilize the plant to help it grow and thrive. Do harvest basil when it is young and tender, not old and tough. This will ensure the leaves are fresh, flavorful, and not bitter or woody. Harvest basil when the leaves are about two to three inches long before they curl or turn brown. How to Pick Basil Leaves? Picking basil leaves is another way to harvest and use the leaves in your dishes. You can pick basil leaves with your fingers or with a pair of tweezers, depending on your preference and convenience. Here are some tips on how to pick basil leaves. For instance, you can pick it: From the top of the plant, not the bottom or the middle. This will allow the plant to grow stems and leaves from the lower nodes and maintain its shape and structure. From the stems that have terminal buds, not from those that have none. This will prevent the plant from flowering and seeding and producing more leaves. You can also pick some of the lower leaves but leave enough leaves on the plant to allow it to photosynthesize and grow. Gently and carefully, and not roughly or forcefully. This will avoid injuring the plant and exposing it to diseases or pests. Use your fingers to pinch off the leaves or a pair of tweezers to pluck them off. Be gentle and precise, and do not pull or tug on the leaves or the stems. When they are young and tender and not when they are old and tough, this will ensure the leaves are fresh, flavorful, and not bitter or woody. Pick basil when the leaves are about two to three inches long before they curl or turn brown. How to Store Basil Leaves? Storing basil leaves is a great way to preserve and enjoy them for later use. You can store basil leaves in different ways, depending on how long you want to keep them and how you want to use them. Here are some of the best ways to store basil leaves: Refrigerate Them You can refrigerate basil leaves for up to a week, by wrapping them in a damp paper towel and placing them in a resealable plastic bag or an airtight container. This will keep them moist and fresh, and prevent them from wilting or drying out. However, you should not wash them. Freeze Them You can freeze basil leaves for up to six months, by blanching them in boiling water for a few seconds, and then plunging them in ice water to stop the cooking process. This will preserve their color and flavor, and prevent them from browning or oxidizing. Then, pat them dry with a paper towel, and place them in a resealable plastic bag or an airtight container. You can also chop them and mix them with some olive oil, and freeze them in ice cube trays. This will make it easier to use them in soups, sauces, or dressings. Dry Them You can dry basil leaves for up to a year, by hanging them upside down in a warm and dry place, such as a closet or a pantry. This will dehydrate them and concentrate their flavor, and make them last longer. However, you should avoid drying them in direct sunlight, as this can bleach them and reduce their quality. You can also dry them in an oven or a microwave, but be careful not to burn them or overcook them. Once they are dry, you can store them in a glass jar or a spice container, and crush them or grind them before using them. Make Pesto You can make pesto with basil leaves, by blending them with some garlic, pine nuts, parmesan cheese, and olive oil. This will create a delicious and versatile sauce that you can use for pasta, sandwiches, salads, or dips. You can store pesto in the refrigerator for up to a week, or in the freezer for up to six months. You can also customize pesto by adding other herbs, nuts, cheeses, or spices, according to your taste and preference. How to Cut Basil? Cutting basil is a simple and easy way to harvest and use the leaves in your dishes. You can cut basil with scissors, a knife, or your fingers, depending on your preference and convenience. Here are some tips on how to cut basil: Wash and dry the basil leaves before cutting them to remove any dirt or insects. You can rinse them under running water or soak them in a water bowl with a few drops of vinegar. Then, pat them dry with a paper towel or spin them in a salad spinner. Cut the basil leaves just before using them, to preserve their flavor and aroma. If you cut them too early, they will lose their freshness and wilt. You can also bruise or damage the leaves if you cut them too roughly or with a dull tool. Cut the basil leaves according to the size and shape that you need for your recipe. You can either leave them whole or chop them finely or coarsely. You can also cut them into ribbons or strips, by stacking several leaves together, rolling them up, and slicing them thinly. This is called the chiffonade technique, and it creates a beautiful and elegant garnish. Cut the basil leaves with a sharp and clean tool, such as scissors or a knife, and not with a blender or a food processor. This will avoid bruising or crushing the leaves and releasing their oils and juices. You can also use your fingers to tear or pinch off the leaves but be gentle and careful. How to Use Basil Leaves? Using basil leaves is a fun and easy way to add flavor and aroma to your dishes. You can use basil leaves in different ways, depending on your mood and occasion. Here are some of the best ways to use basil leaves: Fresh You can use fresh basil leaves to garnish and enhance your dishes, such as salads, soups, pizzas, and pastas. Also you can use fresh basil leaves to make salads, such as caprese salad with tomatoes, mozzarella cheese, and basil, or Greek salad with cucumbers, feta cheese, and basil. You can also use fresh basil leaves to make drinks, such as lemonade, tea, or cocktails, with basil, lemon, sugar, and water. Cooked You can use cooked basil leaves to flavor and season your dishes, such as sauces, stews, curries, and casseroles. Also you can use cooked basil leaves to make dishes, such as tomato sauce with basil, garlic, and onion, or chicken with basil, cream, and mushrooms. You can also use cooked basil leaves to make breads, such as focaccia with basil, olive oil, and salt, or muffins with basil, cheese, and eggs. Preserved You can use preserved basil leaves to store and enjoy them for later use, such as freezing, drying, or making pesto. Also you can use preserved basil leaves to make dishes, such as pesto pasta with basil, garlic, pine nuts, and parmesan cheese, or roasted vegetables with basil, olive oil, and salt. You can also use preserved basil leaves to make snacks, such as crackers with basil, cheese, and honey, or popcorn with basil, butter, and salt. Wrapping It Up! Basil is a wonderful herb that you can grow and harvest in your garden or indoors. It has a fresh and aromatic flavor that can enhance any dish, and a rich and nutritious profile that can benefit your health and well-being. By following the tips and tricks in this article, you can learn how to harvest basil properly, so that it keeps growing and producing more leaves, how to cut basil, pick basil leaves, and store them for later use, and how to use basil leaves in different and delicious ways. Read Also: Some Facts You Need to Know About Rainwater Harvesting Asparagus 101: When, How, And How Often To Harvest? Exploring Ideas For A Biophilic Home Design

READ MOREDetails
Funeral Home

Amid The Grief, Pick The Right Funeral Home

When you have lost a loved one, the pain, the vulnerability and the sorrow you feel at that time are overwhelming and indescribable. As a result, planning the funeral becomes a real struggle. The planning process itself already carries a sense of defeat and evokes a deep dark hole in the heart. Therefore, when you are looking for funeral homes, it's easy to feel dazed and lose yourself only to make the mistake of choosing the wrong funeral home and end up overspending for substandard funeral and cremation services. While funeral directors will always try to make the process as simple and as comfortable as possible, it helps to know how to choose a funeral home without overpaying for funeral services.   Know How You Want To Say Goodbye: To kick-start funeral planning, it is imperative that you know how you want to say your final goodbyes. Did your loved one have a plan for the funeral? If so, this will make things easier. There are various funeral and burial options available. Knowing what you want will help you express your wishes and give the deceased one last peaceful send-off. So, do you want a celebration of life or a day or mourning? Some of the options provided by funeral homes include: Traditional funerals Cremation A celebration of life funeral Green or buried under a tree funeral Funeral Costs: When dealing with the loss of a loved one, it's hard to be an excellent shopper. However, knowing the cost of funeral services before you start looking for a funeral home is a great strategy to save money - especially, since there is extreme price disparity between different funeral homes. Sometimes, even in the same region, the price difference can be thousands of dollars. To help cover the cost — at what is often an emotionally challenging time — plan ahead and shop around to make the process as affordable and stress-free as possible. Choosing A Funeral Home: When you know how much you can expect to spend on funeral and cremation services, it's time to pick a funeral home. Often, people who choose big-box funeral homes think that they will get excellent services, but they could end up disappointed. You'll want to do your homework before you choose to get your feet wet. After all, amid the tears, you want to work with someone who is friendly, sympathetic and considerate. Always opt for an experienced funeral home that will strive to go above and beyond when making the necessary arrangements for the celebration of the unique life of a loved one. In most cases, people rarely think about funerals. As a consequence, when they lose a loved one, not only do they have to deal with grief but also have to make funeral arrangements for the first time. Besides, funerals aren't events that one can get used to. Even when the funeral is a celebration of life, things can get tough, and people can easily get caught up in the emotional upheaval of losing a loved one. So, pick a well-reputed funeral home to not only lighten the burden but also prevent you from scrambling. Read Also: 7 Important Tips For Planning An Outdoor Event Fact Or Fiction? 10 Intriguing Past Life Stories That Will Give You Goosebumps

READ MOREDetails